
 Print Pictures on Zink Sticky-Backed Paper from your iOS & Android Device.,White Best Price")
Roll over image to zoom in
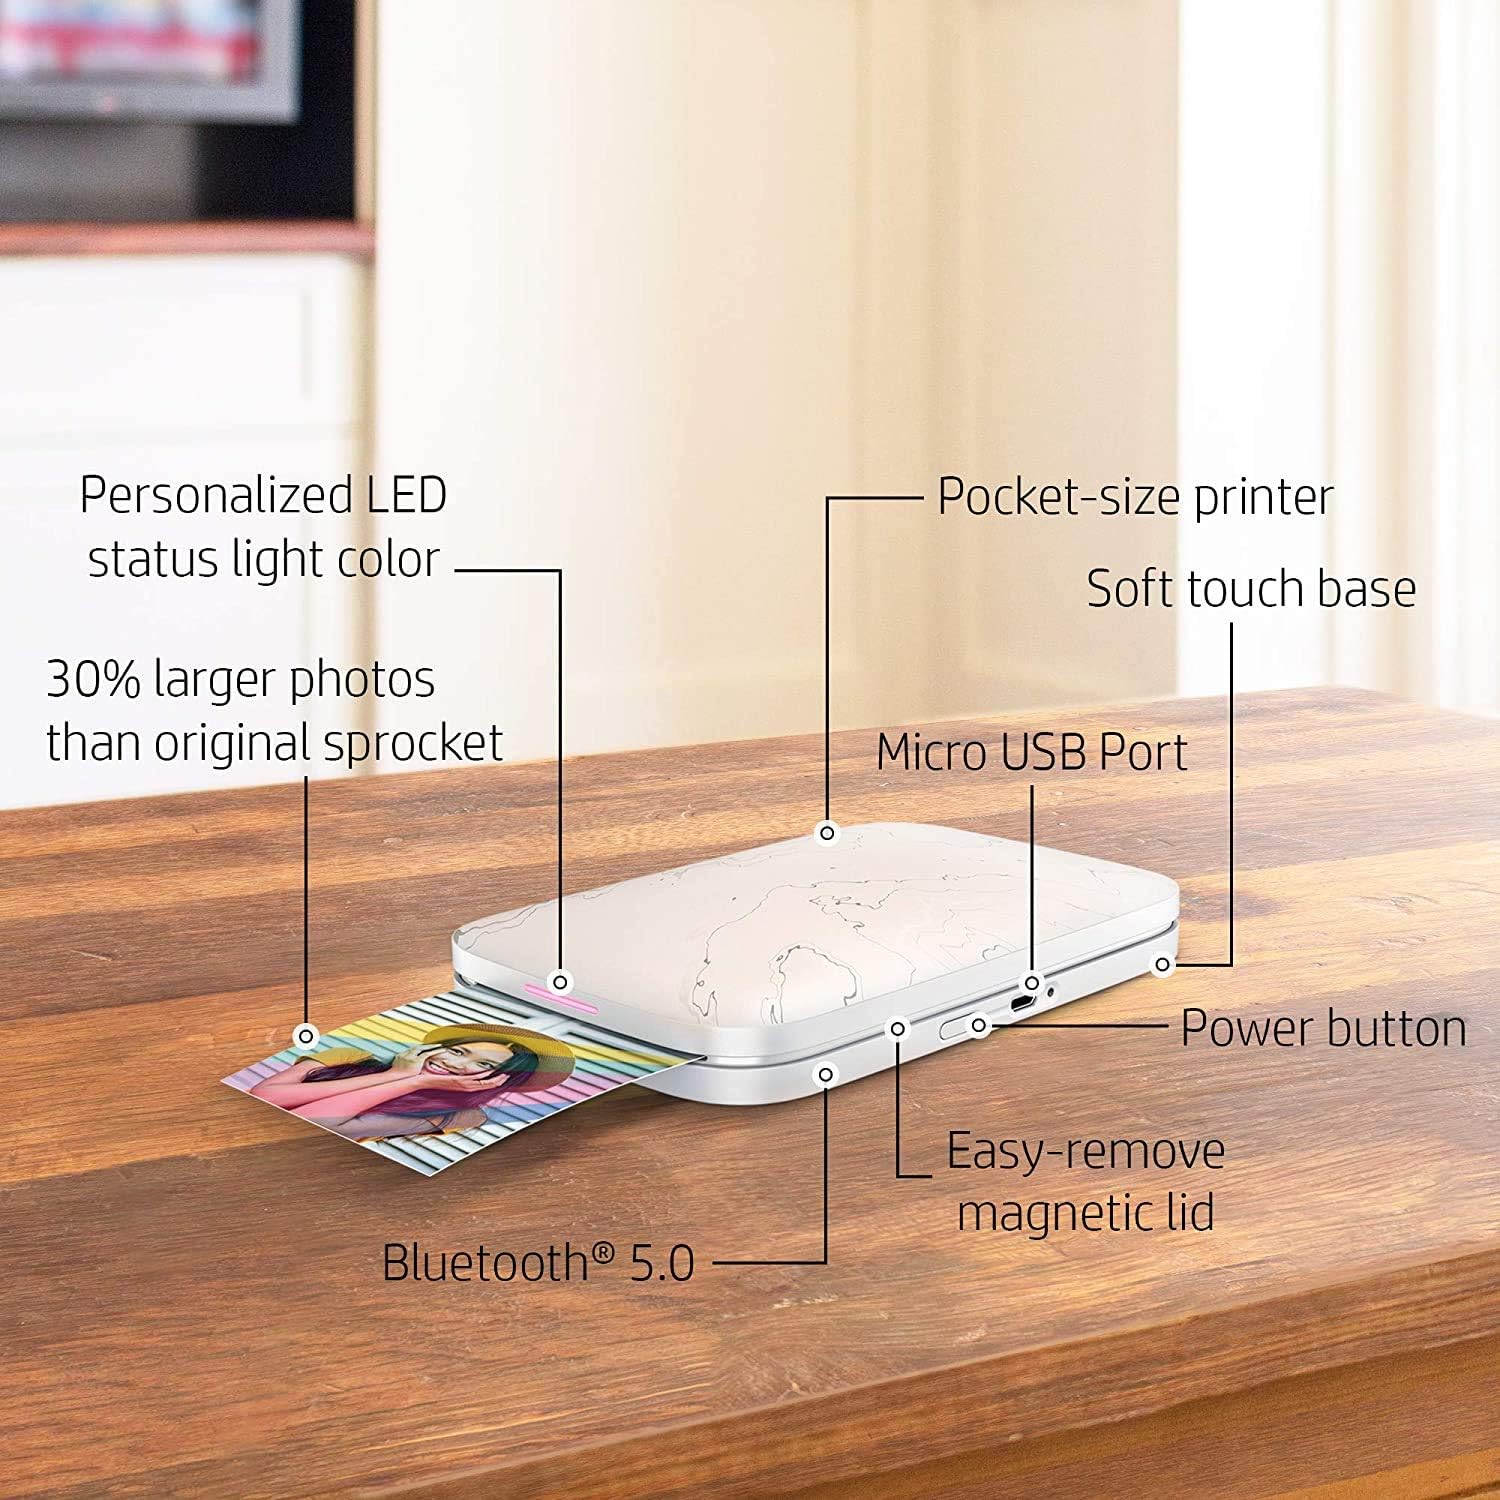
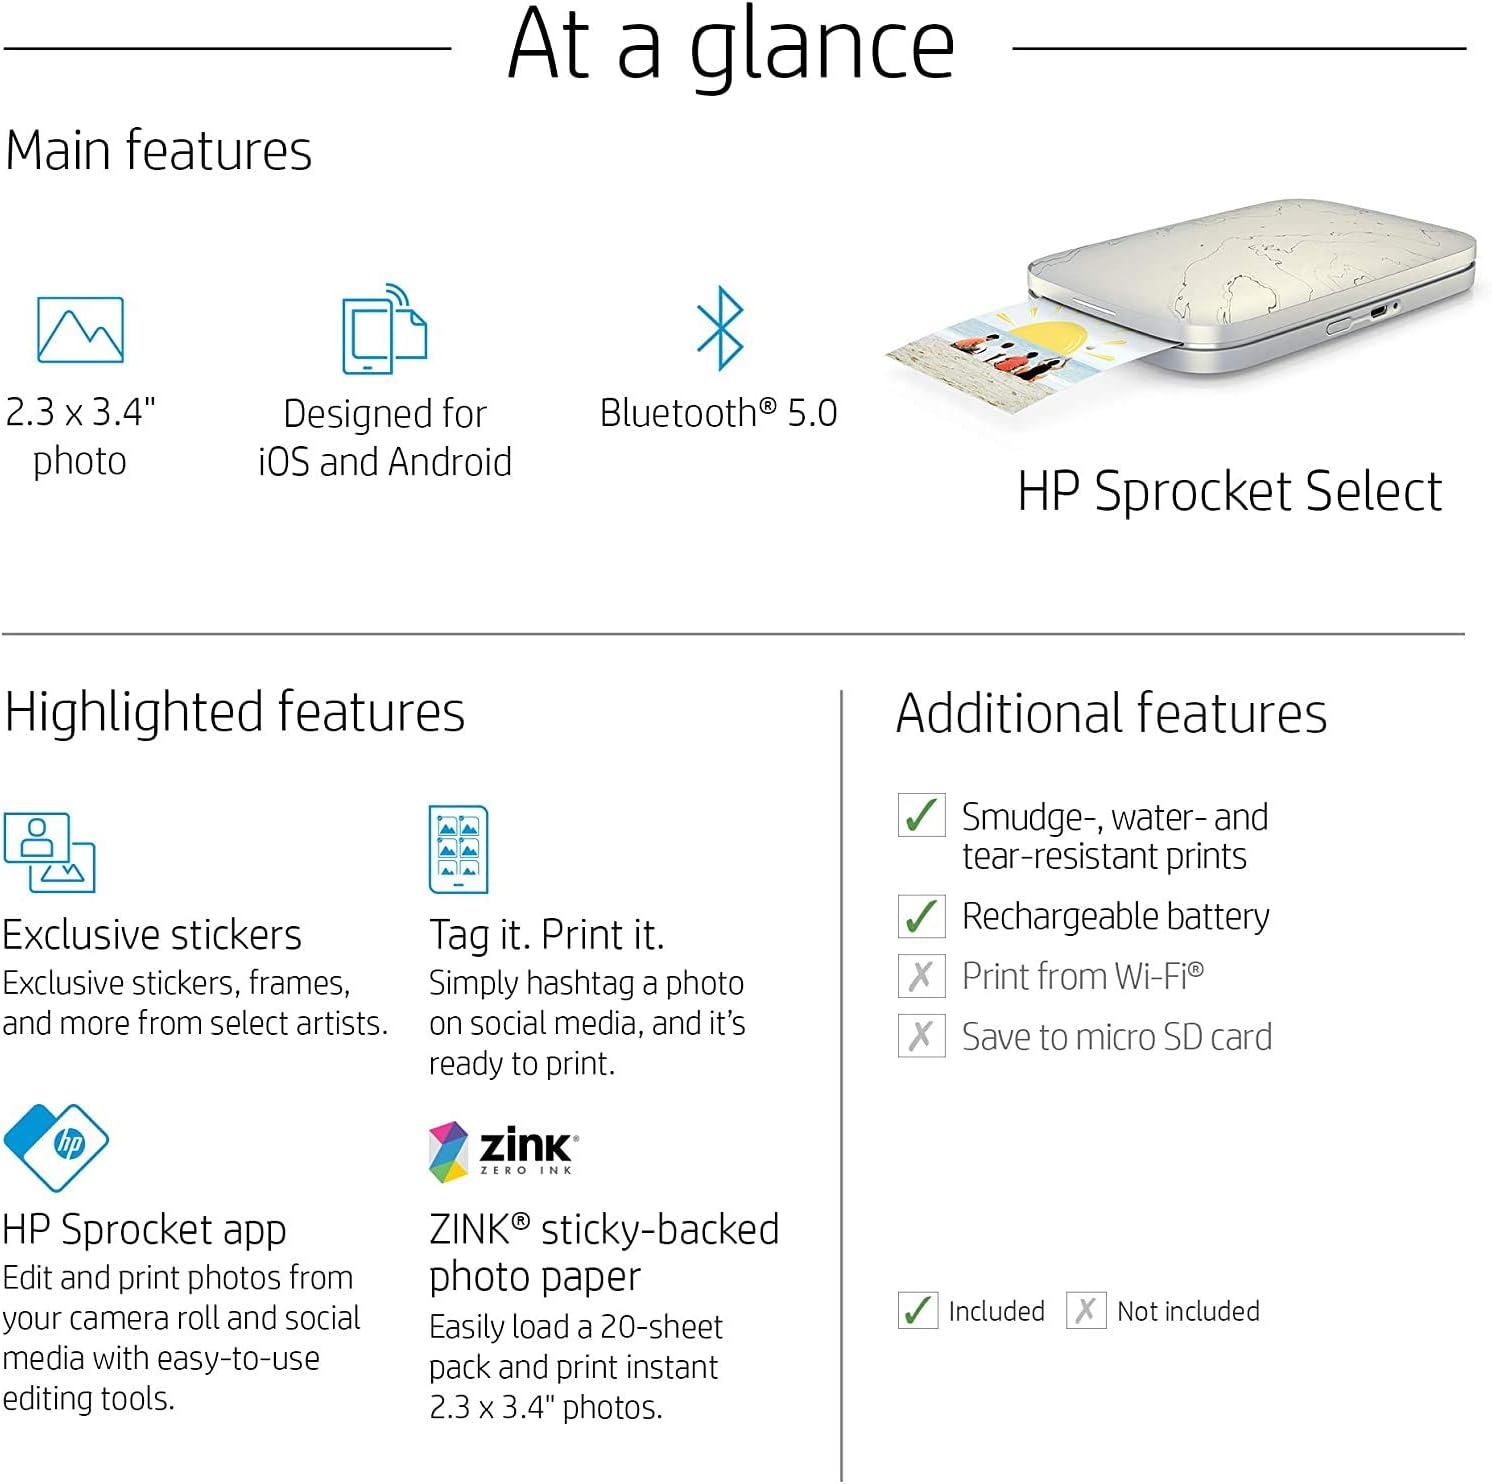
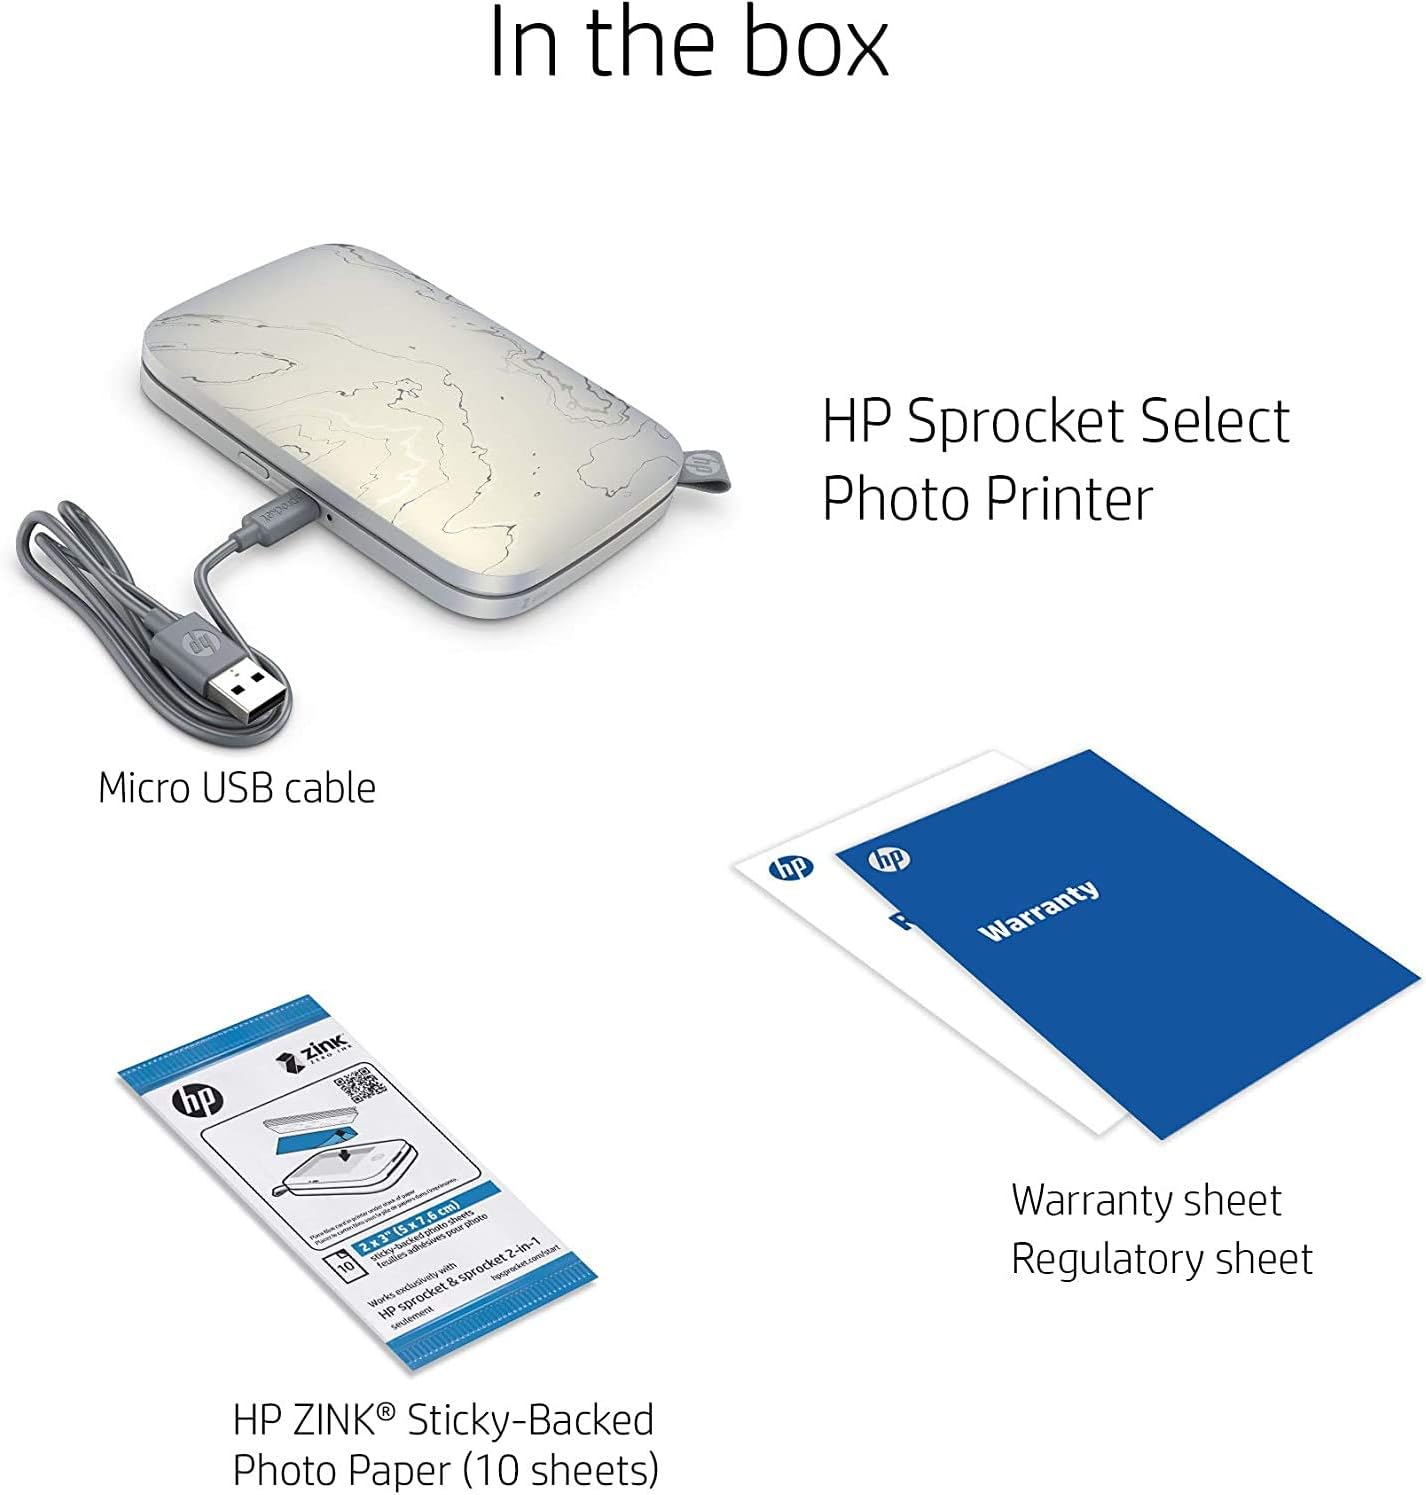
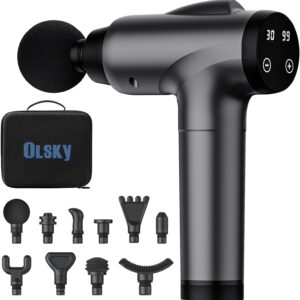
HP Sprocket Select Portable 2.3×3.4″ Instant Photo Printer
$95.00
Description
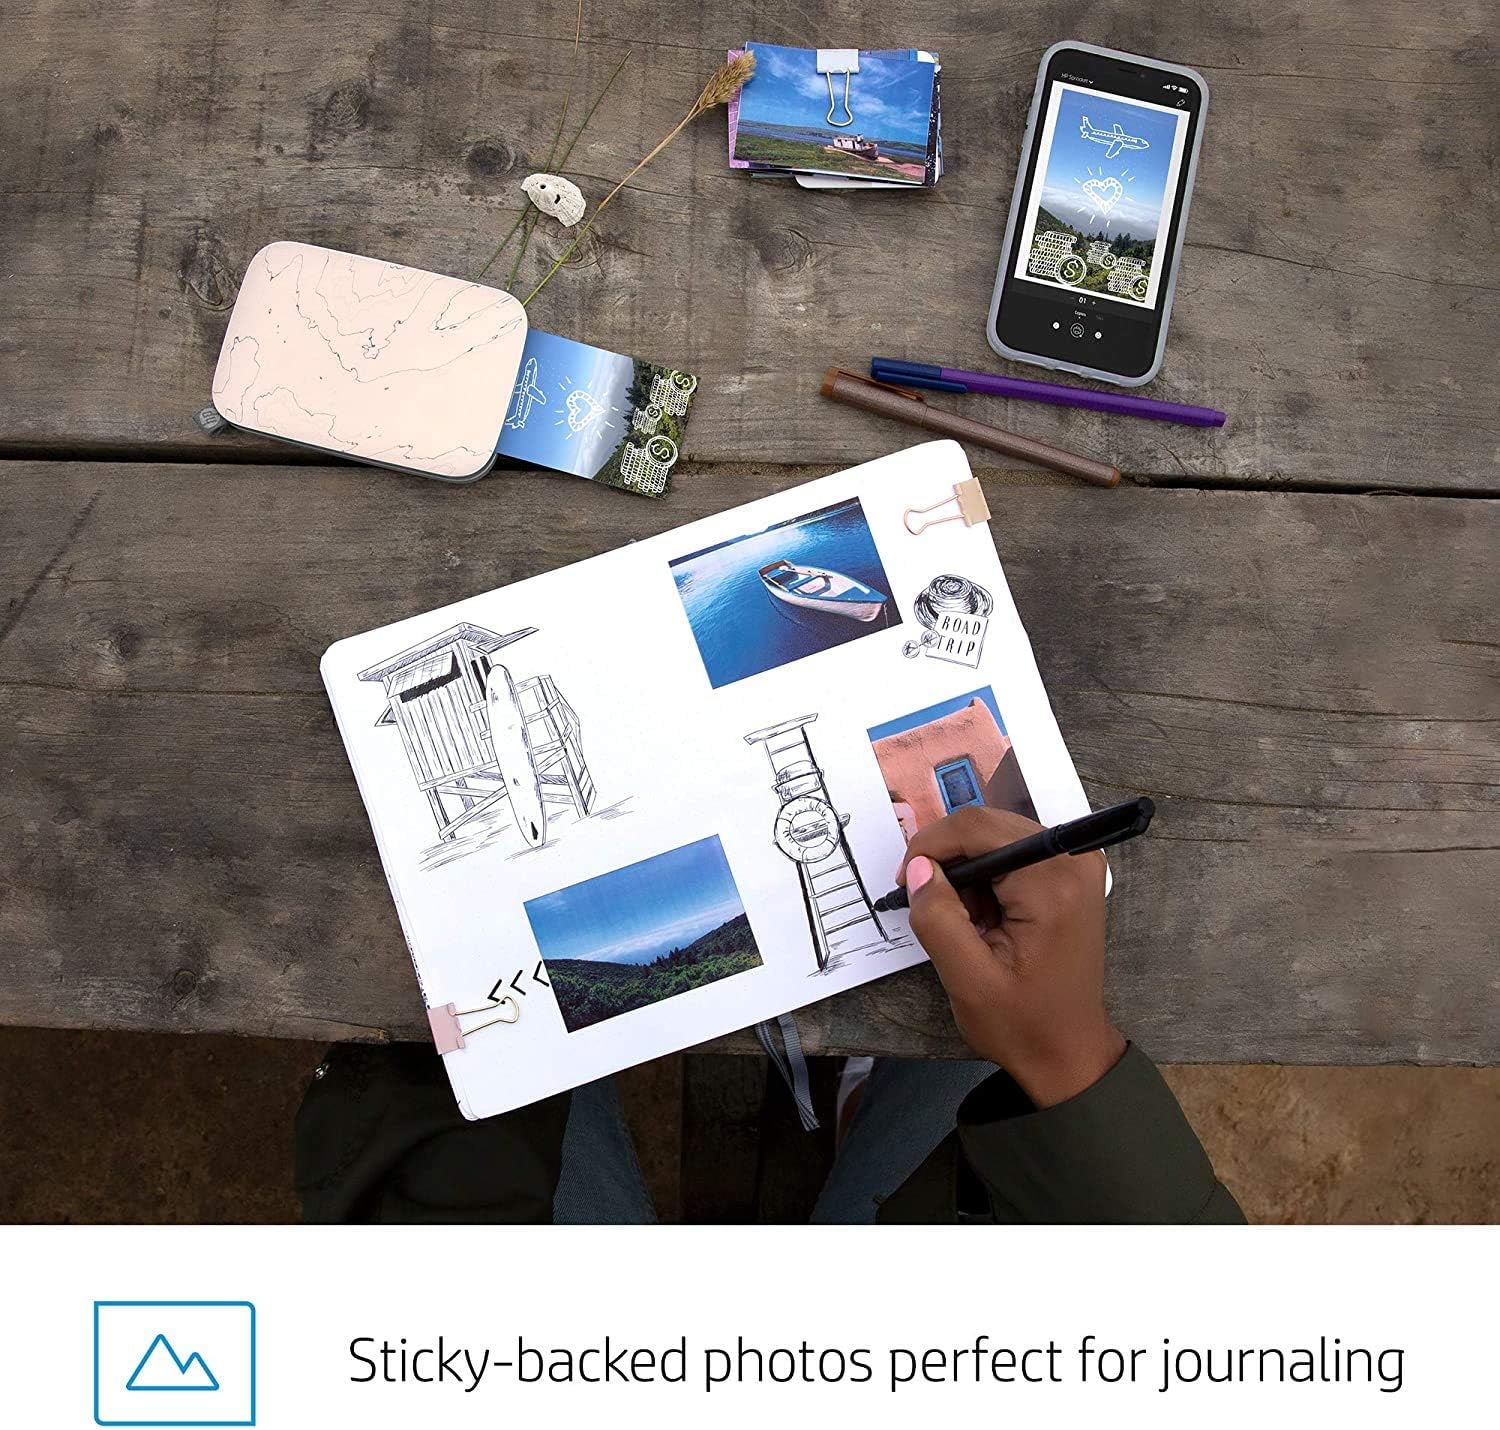
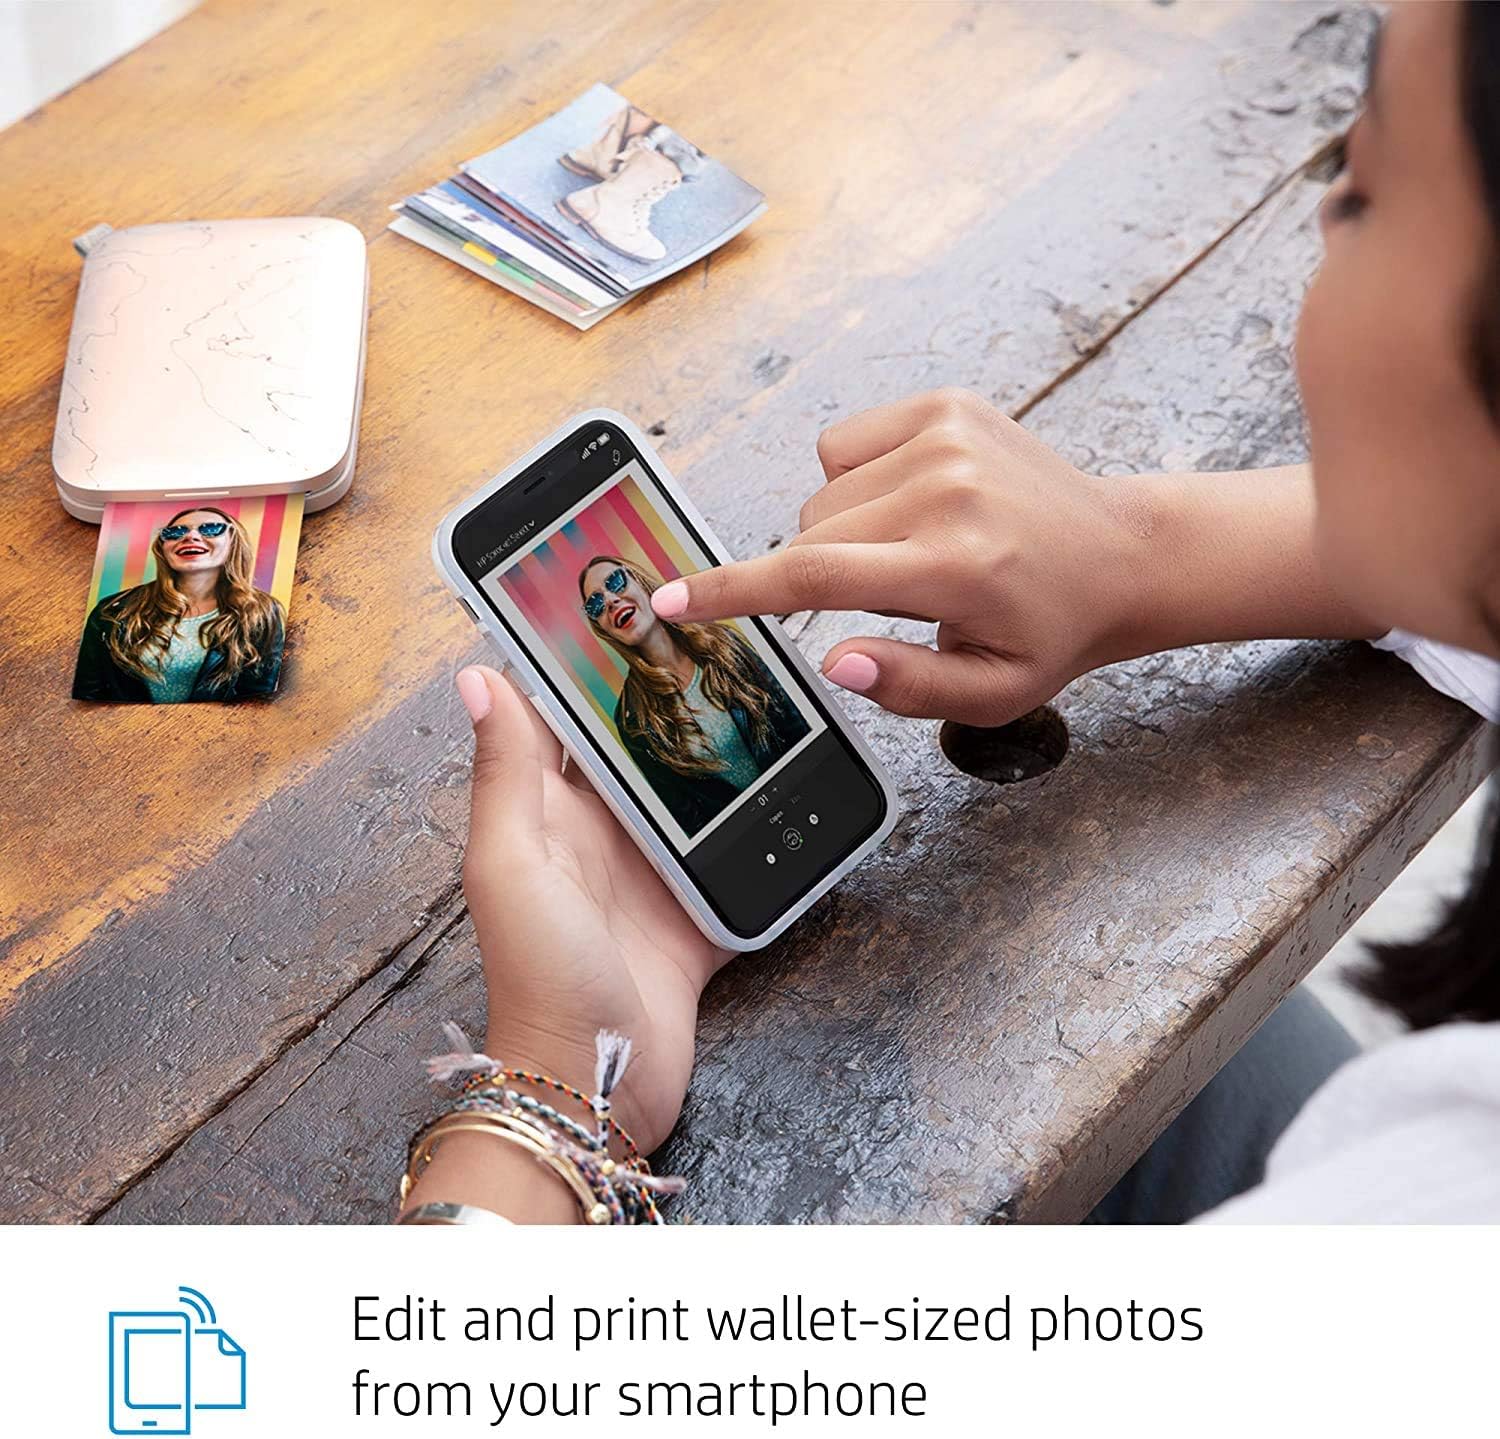
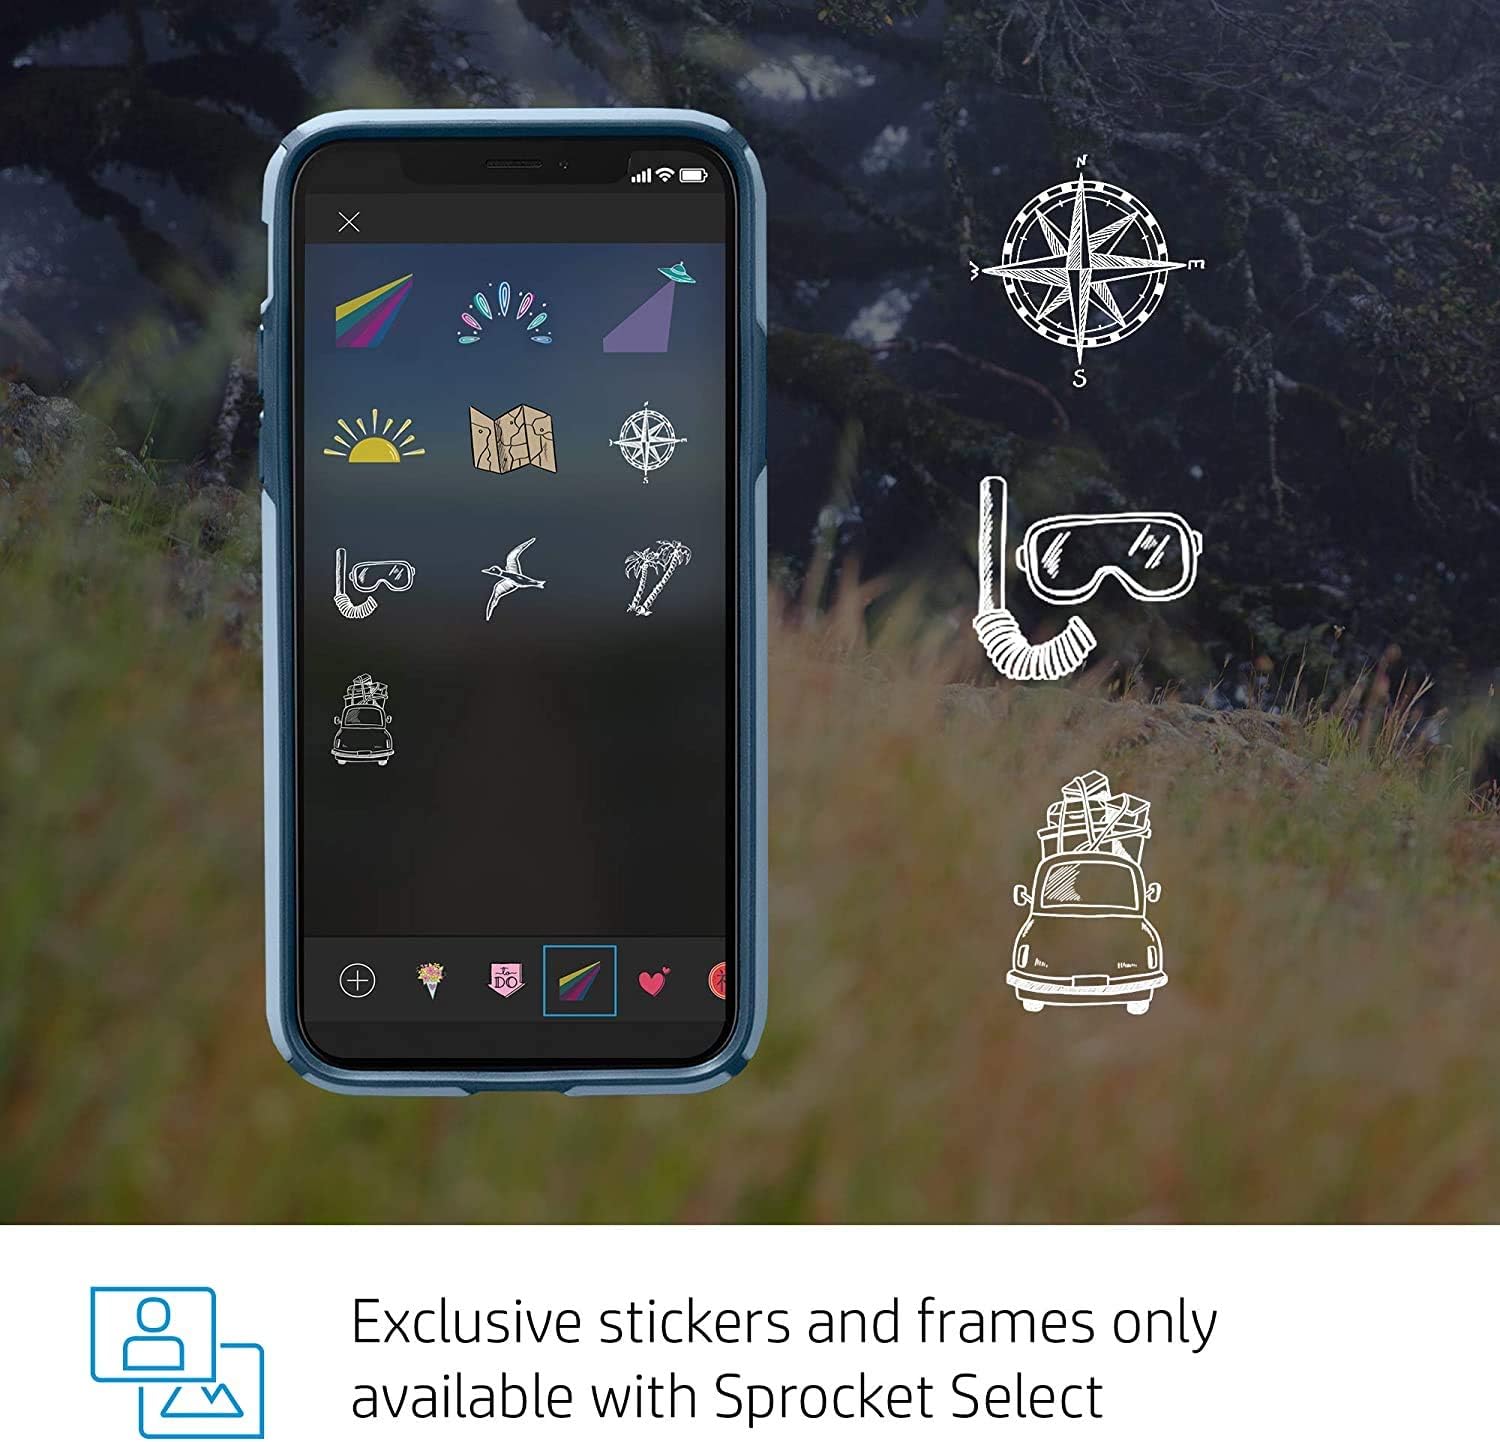
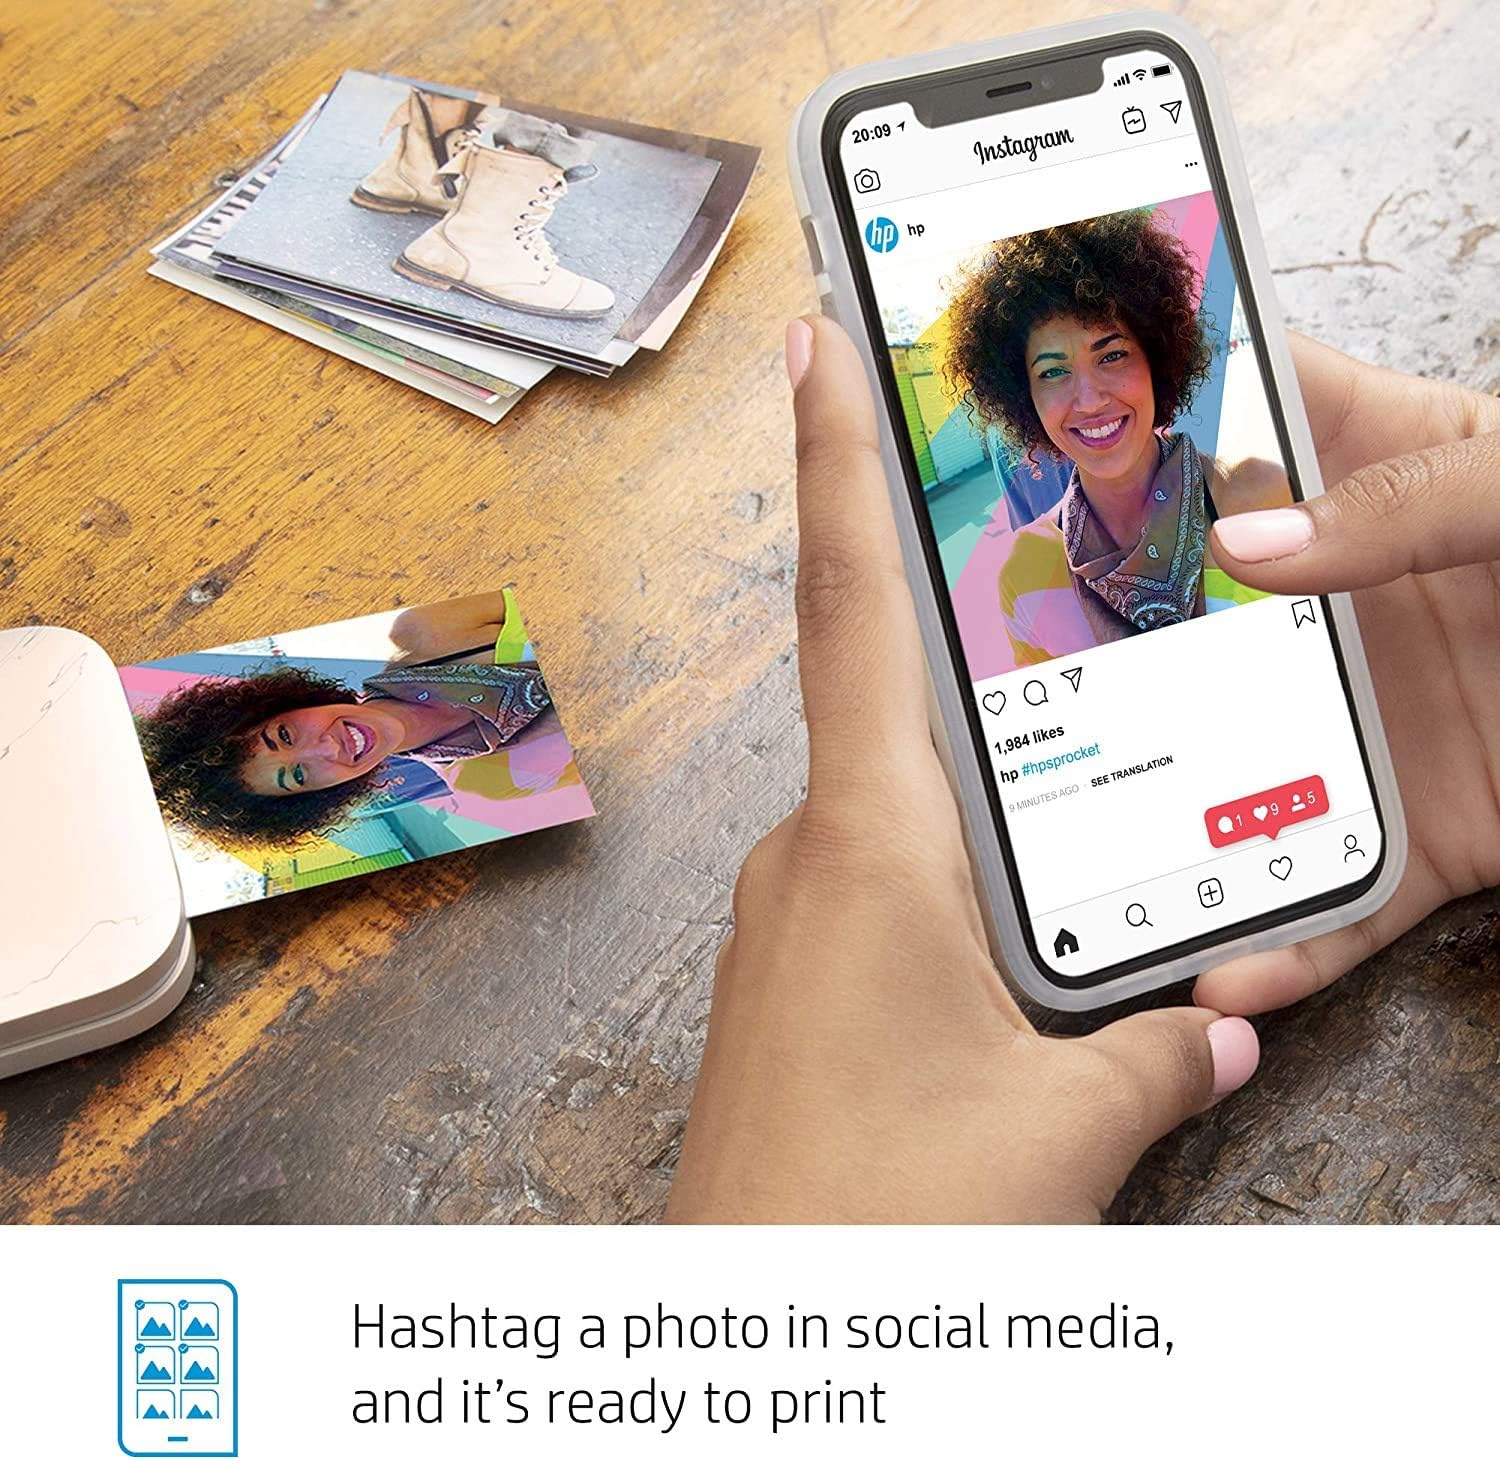
Make the moment yours with the HP Sprocket Select. Download the free HP Sprocket app to access exclusive designer features for your pictures, customize your photos with doodles before printing, and unlock content in augmented reality. Search the app by hashtag to seamlessly filter and print social media photos from your smartphone. Produce glossy 2.3×3.4″ sticky-based photos 30% larger than the original Sprocket’s, and transform them into curated memories.
Specification
Additional information
| Asin | B07SXVJFYN |
|---|---|
| Dimensions | 5.13 x 3.48 x 0.69 inches |
| Weight | 10.8 ounces |
| Manufacturer | No |


by Pranic Healer USA
I dislike nothing about this printer. This printer is not big, but I use it for note taking for a program I am doing. It has sticky paper and even though the paper costs about $25 for 50 prints, it is well worth it. As long as you are looking for this size of prints, get this printer. Everything works perfectly and prints are 100%
by Junalyn
by Brandon
Love it!! I just had one problem with it printing without pressure on the lid. Love that it doesn’t take ink and all you have buy is the paper. Kinda like a polo rood but you don’t have to wait for it to develop.
by Amazon Customer
I bought this photo printer to print pictures of my daughter to document her first year of life in a book. This printer has been causing me so much grief since purchasing. I bought it in December 2022 and it is now October 2023 and I am still torturing myself to get through her first year of life by keeping the photos consistent in her book. I WANT TO LOVE THIS THING – but it wastes more paper than it actually should use. The photo paper gets jammed and will continue printing mid picture.. causing the whole photo to be distorted and the photo paper to be ruined. With the photo paper being 50 cents a pop, I have probably wasted 50% of the photo paper I have purchased because of this machine’s poor quality. The charge does not last long AT ALL. The photo quality is just alright.. I am so disappointed that I chose this machine for this year-long project. Do yourself a favor and look at other options before purchasing.
by sandrift
This is a great little printer *for what it is*. It’s incredibly small and lightweight, and the app is well-designed and easy to use. The print size is a smidge larger than other printers, which I like, and the sticky-back Zink paper is perfect for journaling. But (and DO NOT come at me over this) you should not expect to get the best results without a little effort. There’s a reason that photographers use apps like Photoshop and Lightroom and it’s because NO printer will reproduce exactly what you see on a screen. Some of that is due to the printer calibration and some of that is your screen/device/camera calibration. If you demand high quality image reproduction, you don’t want a pocket printer — they all return worse quality in color, sharpness, etc., than a half-decent desktop inkjet printer. You are buying *convenience* with pocket printers. THAT SAID, a fair number of people are reporting a pink (magenta) or blue (cyan) cast to their prints that other manufacturers’ models do not seem to have, which is decidedly disappointing. Mine has a pink cast, hence my -1 star.
There are instructions from the manufacturer for resetting the unit to address this problem, and you should use the calibration card in each Zink packet as recommended (and keep it for recalibration). If those things do not work, there are some simple edits you can make to your photo (before you open it in the HP app) to correct for the color cast if you otherwise like the Sprocket Select and are willing to sacrifice a few prints in the process. The suggestions below will not be news to most photography enthusiasts (let alone professionals) — I’ve included them here because even though I think that HP has considerable room to improve the thermal control of this printer (which is how the colorization occurs with Zink paper), I still think this little printer has a lot going for it and casual photographers can get much improved prints from it.
1) The simplest method: You can counteract color casts by finding the “tint” setting in your photo editor (ALWAYS be sure to make and work on a copy of your original image if you’re not sure you can revert the image to its original state by undoing the edits). If your prints have a blue/cyan cast, use the tint adjustment to push the image towards red/magenta; if your prints are pink, move the tint towards green. For relatively simple editors (e.g., iOS Photos), you might start by making a 100% adjustment and then backing off from there in 10-20% increments for subsequent prints (of the same image) if you’ve gone too far. The image may look horrible on screen, but that’s not the point. Whatever setting you decide gives the best result, apply it to future images (or their copies) before you open them in the HP Sprocket app; this won’t work 100% of the time, but should help in many cases. Also be aware that various editing apps for different devices will apply differing amounts of adjustment at comparable settings (e.g., “50%” in one app on one phone may be “75%” on another phone or in a different editing app), so you may want to follow some of the additional steps below to dial in the best possible correction, albeit at the price of a few more test prints.
2) If you’re willing to put in a bit more effort: pick a photo that is representative of your most common subject (e.g., landscape, portrait, nighttime) and choose one with a good range of values (light to dark) and that is not under- or overexposed. Convert this to black and white (monochrome) in your phone/tablet/computer photo editor (no fancy enhancing filters, just a basic conversion) and print the image. This will allow you to see which values in the image have the greatest color cast (highlights, mid-tones, or shadows), which can be hard to see in a color image.
3) Go back to the original color image (or your copy!) and target your tint correction by looking at the values (areas) of the image with the worst color cast in the black and white version. This is inherently subjective, and remember it’s not meant to look good onscreen. Make a print and assess whether you need more or less tint correction. Rinse and repeat until you’re satisfied enough, recalling that you’re not aiming for perfection from this convenience printer.
4) For the folks with more sophisticated photo editing apps that allow targeted editing of color balance in terms of value ranges — highlights, mid-tones, or shadows (e.g., Lightroom or Pixelmator Photo on iOS): Start with Step 2 to figure out where the color cast is the worst but instead of changing the image tint in the original color image (which affects the whole image), tweak the cyan/red or magenta/green balance for just the values in the image that need the most correction (e.g., mid-tones). If you’re not sure whether the cast is in, for example, the mid-tones or highlights, just pick one (mid-tones) and make a 100% change in the color balance relevant to the color cast your prints have — if the area you’re concerned with (from step 2) changes the most onscreen, you’ve got it. If not, undo and try the other value range. If you like the result and your photo editor allows it, save this setting as a preset and apply to future images before printing. (And you can edit two or all three of the value ranges with differing amounts of color correction!)
5) For the truly adventurous: follow step 4 with additional enhancements, such as slight bumps to settings like “vibrance”, “clarity”, overall brightness (if images print a bit dark) and contrast (if images look a bit flat). Your photo editor probably allows changes to brightness in the value ranges of the color balance section, too, if you want a targeted effect. Save as a preset and apply to future images before opening them in the HP Sprocket app for printing.
Using these techniques, I was able to get a *much* better, more true-to-life color print after five prints (original; B&W; 100% green tint; less tint correction and more brightness; and finally, targeted value range corrections to color and brightness with bumps to overall vibrance and contrast based on earlier prints). You may not want to have to do anything to your images before printing – in that case, move along or take your chances and be prepared to return you unit if you dislike the prints. But if you don’t mind a little twiddling, I actually recommend this little printer.
by MKarnes
My daughter received this for Christmas and she absolutely loved it. She finally opened yesterday, yes, just over a month after Christmas, and we tested it. First off, the download, setup and loading of the paper is extremely easy and straight forward. It would be very difficult to mess it up. One thing to keep in mind is loading the paper properly, just look at the instructions and orient it as the picture illustrates.
After charging the printer my daughter selected a picture and printed it out. I have to say that the quality of the picture ( clarity and colors ) were surprisingly good and the speed of the printer wasn’t bad either. I would say the quality appears to be good based on the one and only picture printed. Should the quality and durability of the printer change I will update my post. So far she’s extremely happy….which makes me very happy!
by Summer
Used it to take pictures on vacation with kids. After 4-5 prints it would overheat and we would have to wait 30 min to cool down then we could continue to print. Liked that it was small easy to pack but overall if your taking a lot of pictures it’s a long process.
by KMK
This works exactly how I was hoping it would. Great for creative projects.
by Kaitlyn McQueen
This was a big hit for mother’s day! My 68 year old mom loves printing photos and sending them to her 97 year old aunt, but as they are often traveling she seems them in large batches when home. Now she can print from the RV and send while on their travels! Prints are amazingly detailed and the sticky back is an added bonus for quick scrapbooking
by Sledge
I have had such fun with this little printer. I found it easy to use and have never had any problems even after months of use! Being able to customize photos with text and adornments quickly & without much effort is such an added plus. Love being able to take pics at a party & provide guests with a customized photo card of the evening’s festivities featuring them as the focus. This is so cool to use for craft projects because the peel & stick backs make it so easy. You do need to be sure not to stress the printer by printing too many continuous pics. It needs a chance to cool As follow the directions & you will be good.